061416-southern-wedding-party-confetti.jpg

wedding blog + planning guide for creative weddings | inspiration for DIY Brides

Brenda's Wedding Blog is your online resource for planning your dream elegant wedding. Helping you find the "wow" in weddings.

Posts tagged wedding menus
6 Unique Decorating Ideas for Wedding Reception Tables

The time for Farmer's Markets has started - and today's post is a blast from that past that I had to re-share again not only because I LOVE incorporating seasonal items into weddings, but because I know I have lots of new followers that may have never seen this post. Here are my top six favorite ideas for unique decorating ideas for your wedding reception tables. Many of these tables incorporate fresh fruits and veggies which is great because not only does it make your tables full of color, it's a cost effective way to decorate. {PS: Want to see many more table decorating ideas? Come see my pinterest Table Settings Board which features over 300 pins}

Want to have have a unique wedding reception table?
Check out these fun ideas . . .

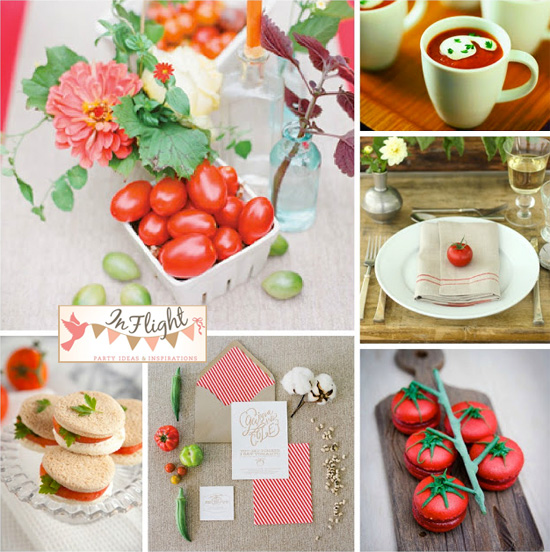
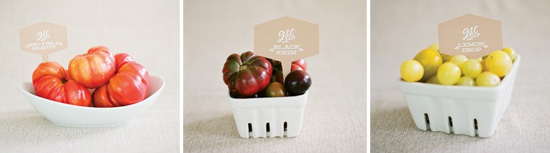
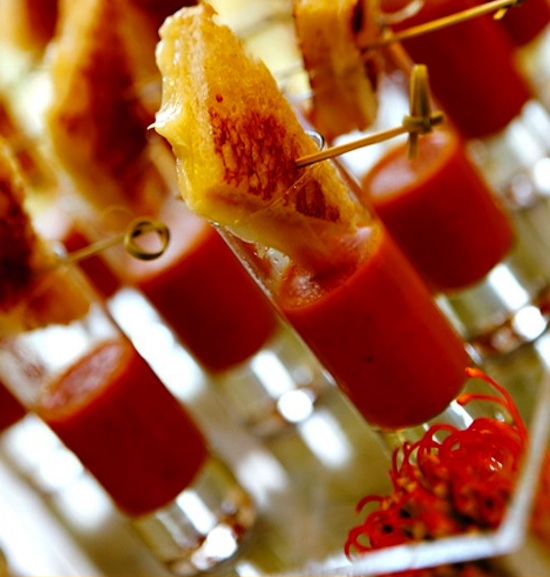
1. Using fresh veggies as both the centerpiece and the hors d'oeuvres
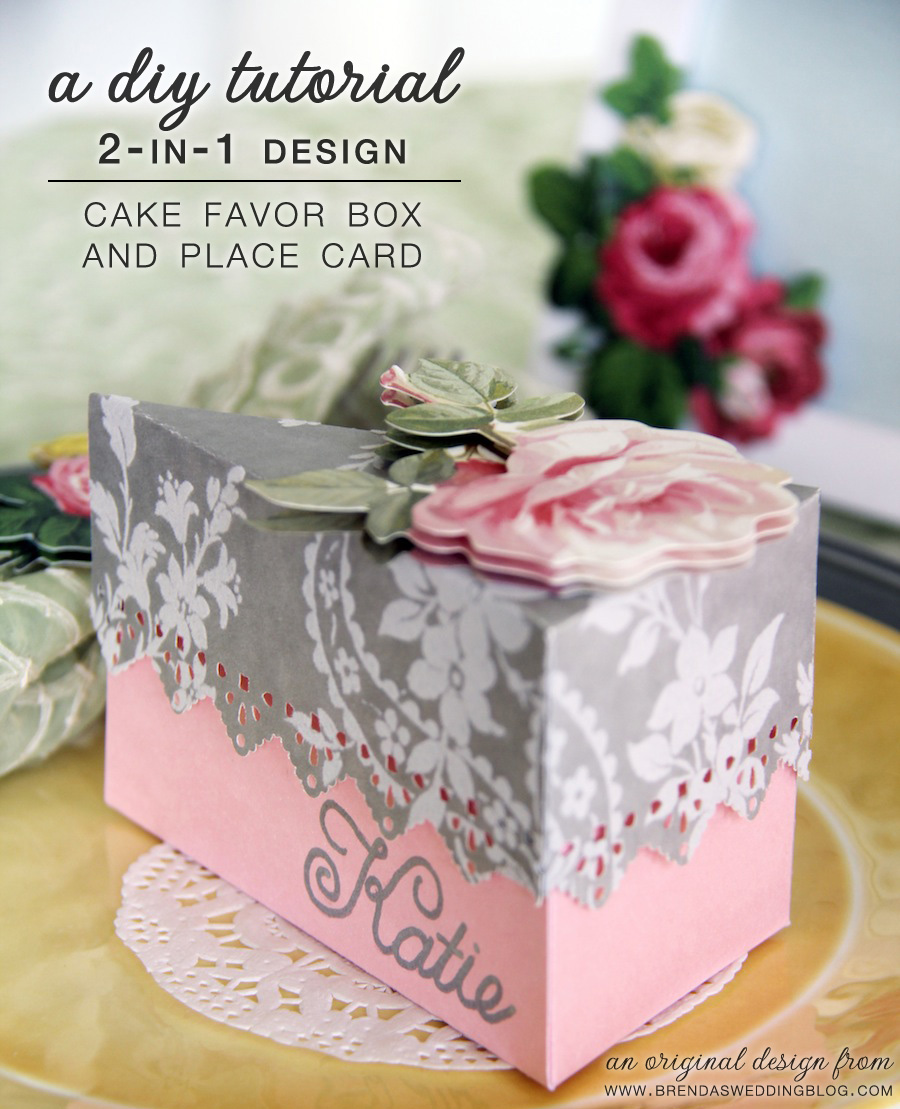
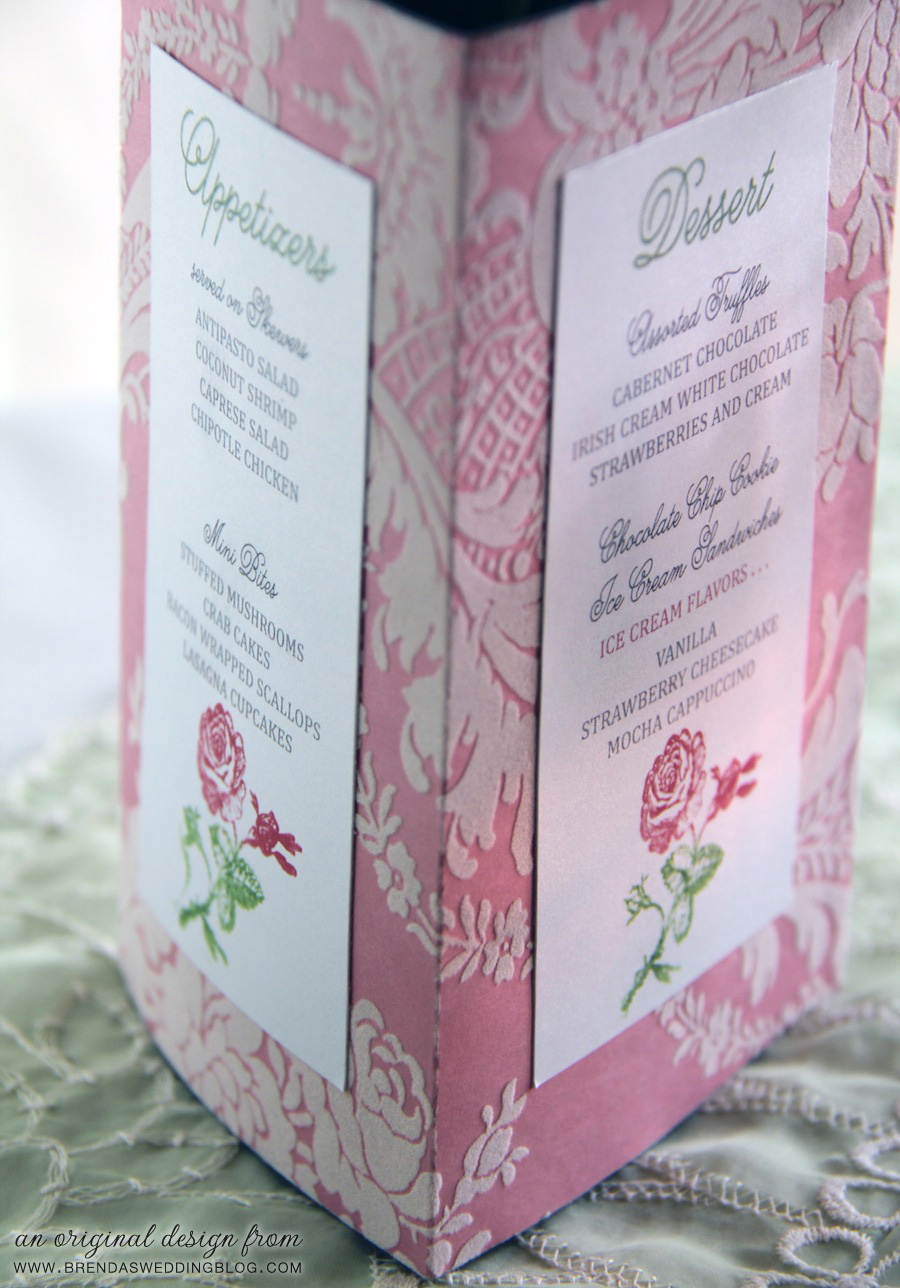
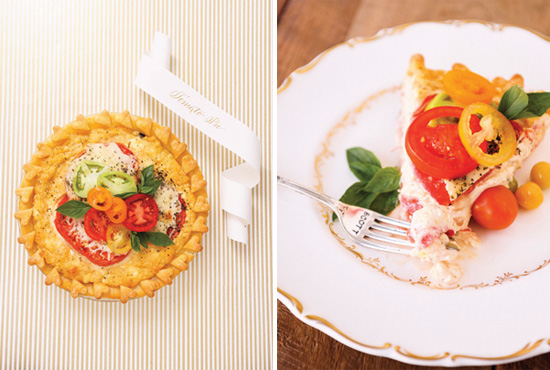
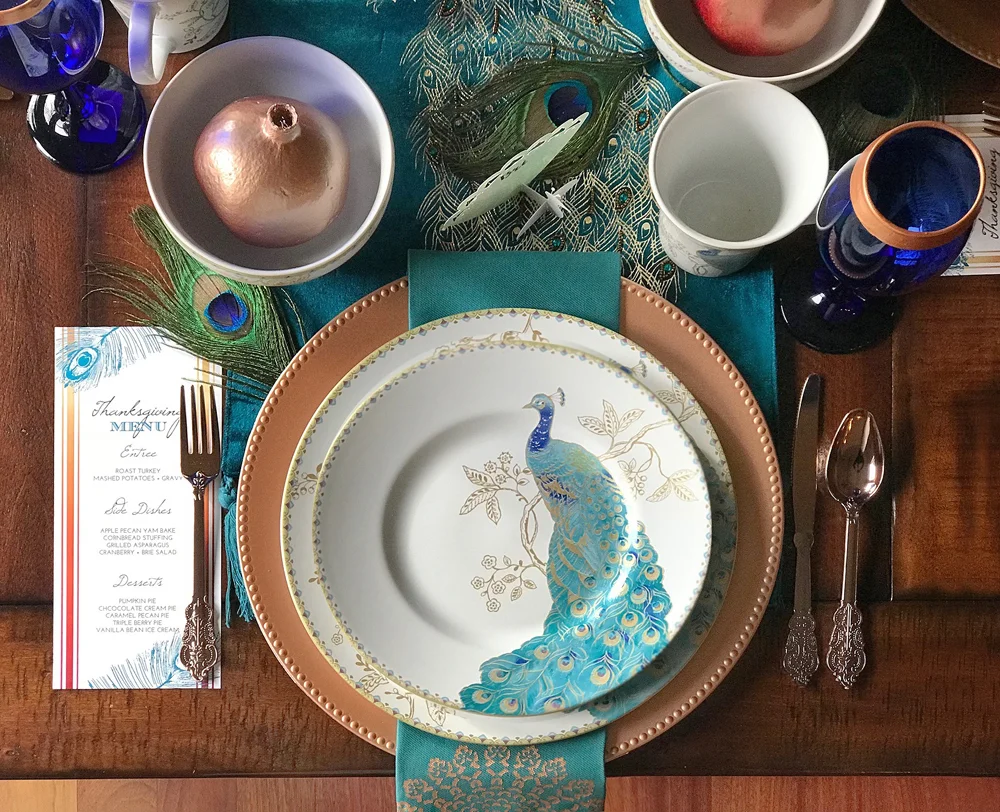
2. Presenting the menu as a folded drop-down under the place setting
3. Stamping or painting the table number onto the table runner
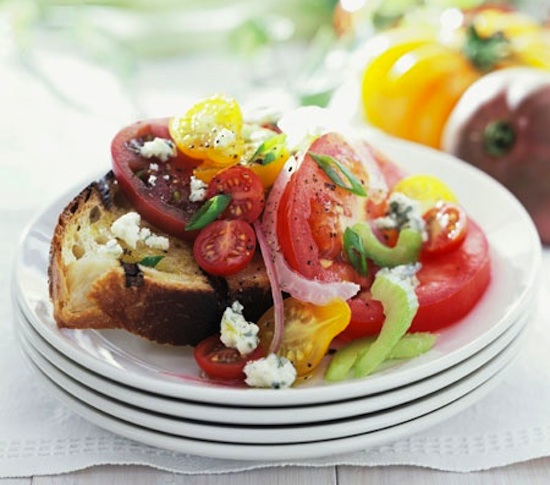
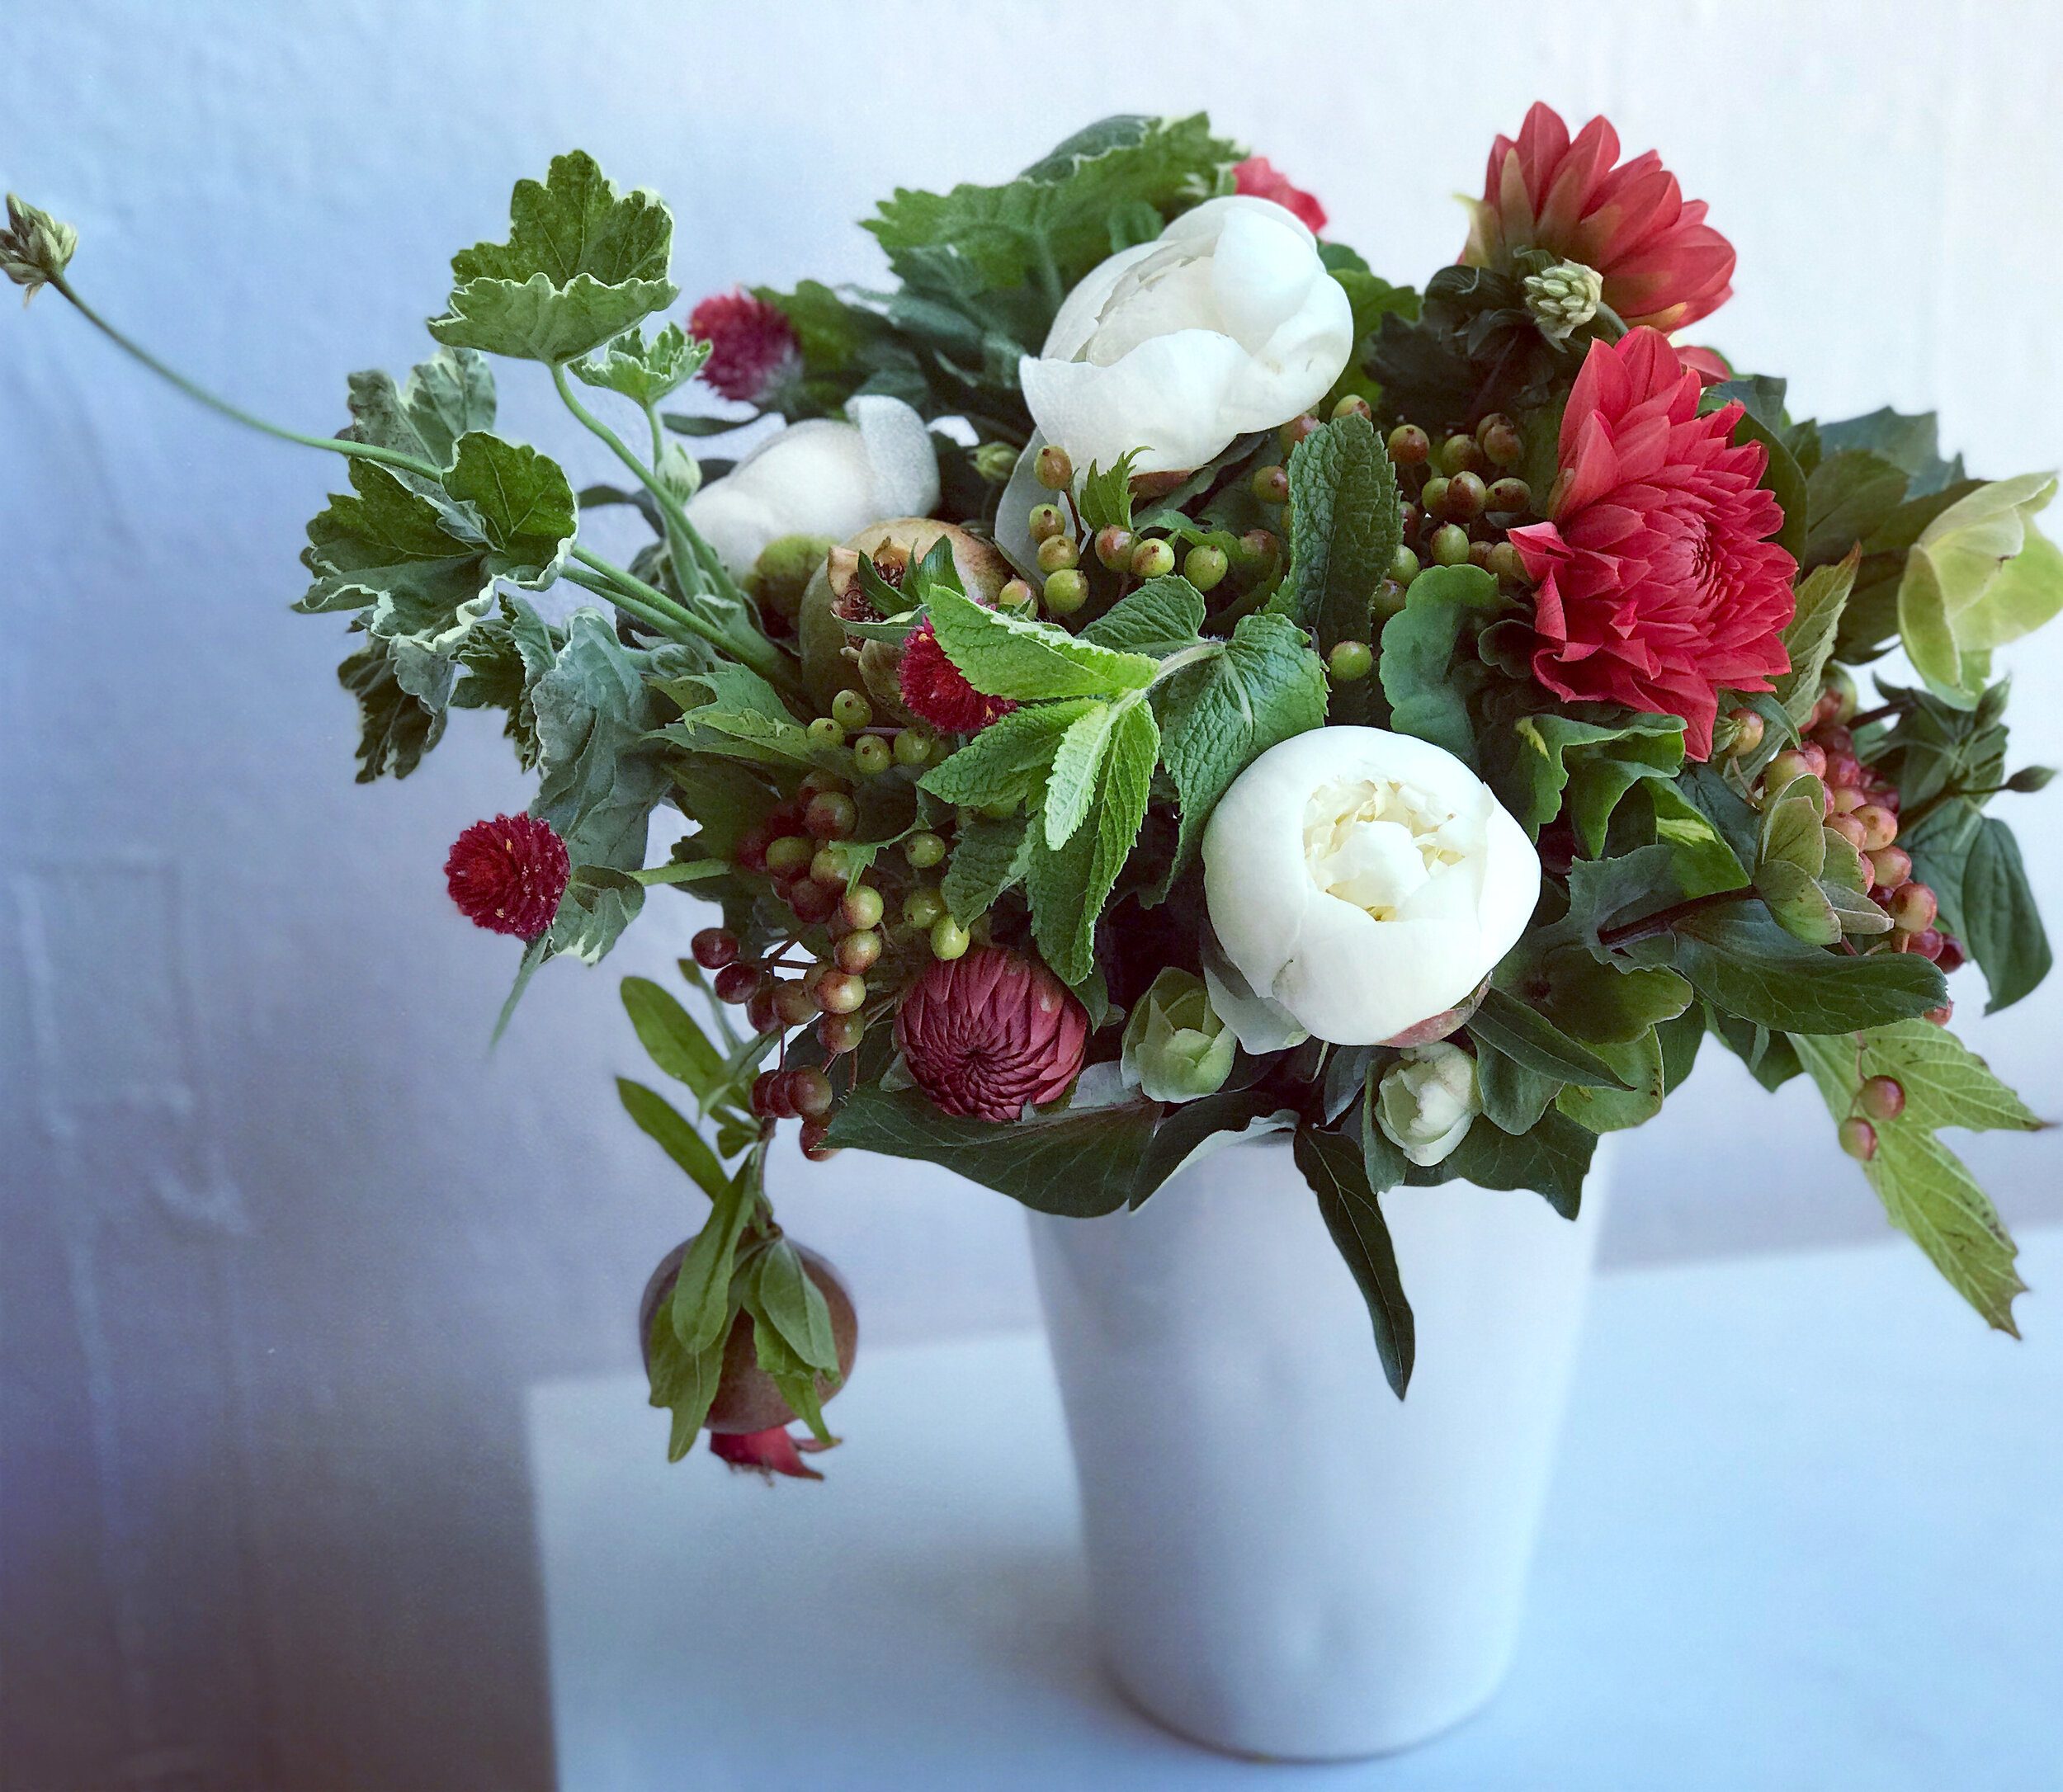
4. Using fresh veggies, flowers, ferns, and/or herbs as an accent at each place setting
5. Creating a fresh lemon boat for place cards at summer events
6. Folding napkins as bows with the napkin ring placed in the center

Don't forget, to see many more ideas, please visit my table setting pinterest board.

Image Credits:
intimate weddings, martha stewart, style me pretty, martha stewart weddings, jessica lorren, marie claire idees, country living, laura ashbrook

this post contains affiliate links

Unique Wedding Programs + Menus : as seen in Bridal Guide Magazine

I'm so excited to share this news with you today - I'm one of the top bridal bloggers selected to be in the current issue of Bridal Guide Magazine with my editorial picks {May/June 2015}. I'm alongside Abby of Style Me Pretty, Leila of Be Inspired PR, Jen of Something Turquoise and Jess of Carats and Cake. I was asked to submit my editors' picks for wedding programs and menu cards that I'm currently obsessing over. Today, I get to share my picks with you . . .

Current Wedding Menu Obsession . . .

Menu Bread Wraps
Instead of the typical menu card, why not wrap your menu around a single baguette for each guest to enjoy? These Menu Bread Wraps from Mavora Art and Design on Etsy are eye-catching and will add the perfect finishing touch to each place setting. You can even tie the menus on with twine in a color that matches your wedding.

Current Wedding Program Obsession . . .

Custom Kraft Paper Bag Wedding Programs
Having a wedding program printed on a kraft bag, like this one from Anna Lou Avenue on Etsy, is not only unique, but useful too. Maybe tuck a tissue pack inside or even a handwritten thank you note from the bride and groom. You could even put a send-off item inside, such as bubbles, confetti, a sparkler or even a treat for your guests to enjoy as they head to the reception.

DIY Wedding Place Card and Menu with Roses + the Say 'I Do' Contest for $1,000 in Anna Griffin & Xyron Products

I can't even begin to say how thrilled I am to share today's post with you. I was recently asked to participate in the Say "I DO" with Xyron and Anna Griffin Blogger Design Challenge. After saying yes, 3 HUGE boxes arrived at my doorstep and were filled to the brim with crafting goodies galore from Xyron and Anna Griffi. Items included a Xyron Creative Station which makes it easy to laminate and create magnets and stickers, gorgeous card stock papers, paper punches, washi tape, water color & metallic markers, dimensional stickers, rubber stamps, and so much more. For this challenge I was asked to design a menu and place card using items that were sent to me. Since, so many amazing crafting supplies were sent to me, I knew I couldn't just stop with a menu and place card. So, I created an entire table setting complete with a menu that doubles as the centerpiece holder and a place card that doubles as a favor box. You can easily say I'm a BIG fan of items that serve a dual purpose :) Below are photos of my items along with step-by-step instructions so you can re-create these items for your own wedding or bridal shower. And, please don't forget to vote for my designs here. If I'm the lucky winner, one of my readers will win the very same AMAZING PACKAGE{s} OF CRAFTING GOODIES worth $1,000 just for themselves. 

Vote for My Designs Here

To access the contest, click here, login to Facebook {if you aren't already} and click on the "Say I Do" contest page

Step-by-Step Instructions for the Place Card and Favor Cake Box Combo

For my place card design I knew I wanted to do something totally unique and unexpected so I thought why not combine the favor box with the place card? And, instead of adding a tag or sticker - I wrote the name of the guest on the box itself. The color combinations and patterns for this box are endless which is something I love. You could keep the same color palette throughout, but change up the patterns to make each box unique if you wish. You can fill these sweet little cake boxes with anything - maybe little candies, a few small soaps if using them for a bridal shower, or even chocolates. If using food related items, I recommend lining the inside of the paper box with a little wax paper.

Supplies Needed:
Anna Griffin Flocked Paper
Anna Griffin Metallic Paper
Anna Griffin Dimensional Floral Stickers
Anna Griffin Border Punch
Xyron Creative Station with the permanent adhesive cartridge
Xyron Mega Runner
Paper Trimmer
X-acto Knife
Printer

Instructions:
1. Select two patterned card stock sheets of your choice sized to 8.5"x11" {may need to trim some of the 12x12 card stock to be 8.5x11}
2. Download the Cake Box Lid Template and Cake Box Bottom Template
3. Place the paper into your printer and print the template on the back side
4. Trim the paper with a straight edge and X-acto knife
5. On the dotted lines of the template, you will score for folding {I highly recommend a bone folder for this}
6. For the box lid, you will want to use the Anna Griffin Border Punch for the scalloped edges
7. Once trimmed, scored and scalloped, you will use the Xyron Mega Runner to run glue along the flaps that fold in on the box top and bottom
8. I used the Anna Griffin Silver Metallic Marker to write the name of the guest on the side of the box. To do this, I chose a font that was used in the menu {for me it was Melany Lane}, sized to fit in the space and printed it out. Simply trace the font onto the backside of the paper with a pencil, then flip over, align on the box and rub over the font with your pencil. Voila! You know have a light tracing of the name. Trace over with the Anna Griffin Metallic Marker.
9. Top the favor box/place card with an Anna Griffin Dimensional Sticker.

Step-by-Step Instructions for the Tri-Fold Menu that Serves as the Centerpiece Holder

For my menu I thought it would be fun to turn it into a tri-fold so each side showed the menu for a particular food course - in this case ... appetizers, the main course and desserts. Then I slipped a narrow glass vase down inside that was filled with fresh roses and the centerpiece is functional and beautiful. Plus, the stems of the flowers are now hidden as well.

Supplies Needed:
Anna Griffin Flocked Paper
Anna Griffin Metallic Paper
Anna Griffin Floral Clear Stamps
Anna Griffin Ink Pads
Xyron Creative Station with the permanent adhesive cartridge
Xyron Mega Runner
Paper Trimmer
Printer

Instructions:
1. Select your 12x12 paper for the tri-fold menu and download and print this scoring guideline template {making sure it's on the backside of the textured paper}.
2. Once printed, simply take your bone folder and score along the guidelines.
3. Trim directly in half so you have two pages that are 6" in height and 12" wide.
4. For the menu, set up a file sized to 2.5" wide by 4.5" high in your favorite editing program.
5. Set up the menu with your favorite fonts and leave 1.5" at the bottom with empty space. {I used Melany Lane and Cambria}
6. Using the Anna Griffin clear rose stamp, place it on the ink pad so just the rose gets the color and stamp on the metallic paper. Be sure to leave it for a while to be sure it's dry.
7. Then stamp just the stem and leaves in the green ink pad and onto the paper
8. Once dried, run the three menu panels through the Xyron Creative Station using the permanent adhesive cartridge and simply center onto the panel of the tri-fold.
9. Once the menus are attached, simply run the Xyron Mega Runner over the flap that will hold the tri-fold menu together, seal the edge and you are finished.

I'm up against 3 other bloggers in this design challenge from Anna Griffin and Xryon and would truly LOVE your support of my place card and menu creations. PS: If I win, YOU could win all the fabulous supplies I used to create these designs and many many more. The package is valued at $1,000. My tutorials for the additional items you see in the table setting {doily coasters, table number frame and napkin rose} will be shared with you next week.

Vote for My Designs Here

To access the contest, click here, login to Facebook {if you aren't already} and click on the "Say I Do" contest page
Anna Griffin on Facebook | Xyron on Facebook

* No compensation was received for this post, I received the free products
to create these DIY projects for the Blogger Design Challenge.
Tomato Wedding Ideas + Menu Inspiration for your Guests

I love when I come across unique ideas and beautiful inspiration boards. This one from Mayra of In Flight is truly inspiring and such a great idea. I also love how the inspiration for the board started when she was looking thru the latest issue of Cooking Light. See inspiration really can come from anywhere - and it's so important to remember this. When you feel like you're drawing a blank when planning your wedding or a party, simply look elsewhere and sometimes something magical can happen. Tomatoes are such a fun theme for weddings and even bridal showers. Not only are the reds. oranges, yellows and greens spectacular together, but just think of all the amazing food choices you could offer your guests. Below I share some of my favorite menu options with you, along with a great idea for incorporating tomatoes into your table numbers.

original post with credits can be found here

photo source: Southern Weddings, credit Eric Kelley Photography

One idea I'm loving is arranging tomatoes in bowls or in the ceramic farmer's market baskets and then adding in markers that let your guests know the table number {here the markers identify the tomato type}. You could showcase different types of tomatoes for each table if there is enough variety where you live, or they can all be the same. Then, after the wedding, the tomatoes can easily be made into tomato sauce. And, if you are looking for menu options that involve tomatoes - how about these choices for an appetizer, salad and main course?

Appetizer: Wouldn't it be fun to serve your guests tomato soup in shooter glasses with triangle wedges of grilled cheese? 

source: Wedding Bells {courtesy of Enchanted Dream Weddings}

Salad: Serving your guests bright colors with an heirloom tomato salad will certainly make them super happy. And, you can serve it on a toasted piece of rustic bread to serve as the crouton.

source: Brides

Main Course: Can't go wrong with mixing it up a bit and serving guests a slice of tomato pie for dinner.

source: Southern Weddings, credit Eric Kelley Photography